
A popsicle, also known as an ice lolly, ice pop, or freezer pop in various parts of the world, is a frozen dessert consisting of flavoured ice or ice-cream on a stick. It's typically made by freezing a liquid mixture in a mold, which is then served as a single-serving treat. Popsicles come in a variety of flavours, colours, and shapes, catering to different tastes and preferences.
Now that we’ve understood what is a popsicle, let’s look at its origin. The history of the popsicle traces back to the early 20th century, with its invention credited to an 11-year-old boy named Frank Epperson in San Francisco, California, around 1905. Legend has it that Epperson accidentally left a mixture of powdered soda, water, and a stirring stick outside on a cold night. By morning, the mixture had frozen solid, and thus, the "Epsicle" was born. Later, in 1923, Epperson patented his invention and started selling them at amusement parks under the name "Popsicle," a portmanteau of "pop" (from soda pop) and "icicle."
The popularity of popsicles quickly spread across the United States and eventually around the world. In India, popsicles are commonly known as "Gola" or "Gola ice" and are a beloved street food and summertime treat. Traditionally, Gola is made by crushing ice into a fine snow-like texture, which is then moulded around a stick and flavoured with various syrups or fruit juices. It's often sold by street vendors or vendors at beaches and parks, offering a refreshing respite from the heat.
Why Learn to Make Popsicle at Home?
- Healthier Option: Homemade popsicles allow you to control the ingredients, avoiding artificial additives and excessive sugar often found in store-bought varieties.
- Customizable: Making popsicles at home gives you the freedom to experiment with different fruits, flavours, and sweeteners, catering to individual preferences.
- Cost-effective: Crafting popsicles at home is more economical than purchasing pre-made options, especially when using seasonal fruits or ingredients readily available in your kitchen.
- Fun Activity: Involving your family, especially kids, in the popsicle-making process can be a delightful and educational activity, fostering creativity and healthy eating habits.
Basics of Making Fruit Popsicle at Home
To make fruit popsicles at home, you'll need fresh fruits, liquid (such as juice or yogurt), sweetener (if desired), popsicle molds, and sticks. Simply blend the fruits with the liquid and sweetener, pour the mixture into molds, insert sticks, and freeze until solid. It’s so simple that you can make popsicles at home with your kids. It’s a fun and engaging activity, especially to do during summer vacation.
Strawberry Fruit Popsicle
Ingredients: Fresh strawberries, yogurt, honey (optional).
Steps:
1] Blend strawberries with yogurt and honey.
2] Pour into molds.
3] Freeze in refrigerator.
Prep time: 10 minutes
Calories: Approximately 50 calories per popsicle.
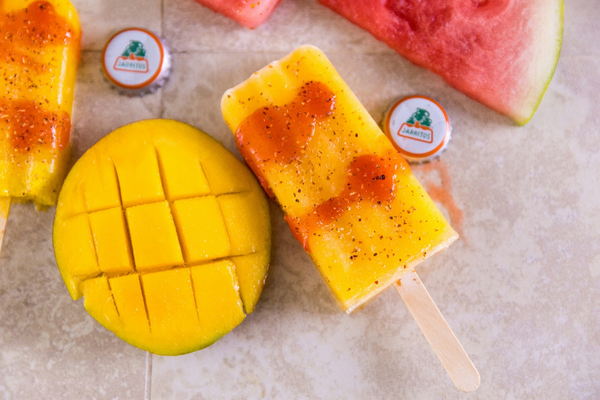
Mango Fruit Popsicle
Ingredients: Ripe mangoes, coconut milk, agave syrup (optional).
Steps:
1] Blend mangoes with coconut milk and sweetener.
2] Pour into molds.
3] Freeze in refrigerator.
Prep time: 15 minutes
Calories: Approximately 60 calories per popsicle.
Kiwi Fruit Popsicle
Ingredients: Kiwi fruit, pineapple juice, lime juice.
Steps:
1] Blend kiwi with pineapple & lemon juices.
2] Pour into molds.
3] Freeze in refrigerator.
Prep time: 10 minutes
Calories: Approximately 40 calories per popsicle.
Nutritional Value of Fruit Popsicle
Homemade fruit popsicles are not only delicious but also nutritious. When you buy popsicles from outside, you aren’t sure of the authenticity and type of fruits used. Once you learn how to make popsicles at home, you’ve full control. They are rich in vitamins, minerals, and antioxidants, depending on the fruits used. For example, strawberries are high in vitamin C and fibre, while mangoes are a good source of vitamin A and potassium.
Tips to Make Popsicle at Home
Use fun shapes and molds to make popsicles more appealing, especially for kids.
Limit the amount of added sugar or use healthier alternatives like honey or agave syrup.
Enjoy homemade popsicles within 3 days for the best taste and texture.
Serve popsicles as a refreshing treat for guests during gatherings or parties.
How To Store Popsicle
After freezing, remove the popsicles from molds and store them in an airtight container or freezer bag to prevent freezer burn. Keep them stored in the freezer until ready to enjoy.
Conclusion
Making fruit popsicles at home is a simple and rewarding way to enjoy a refreshing treat while incorporating essential nutrients into your diet. With endless flavour combinations and the flexibility to control ingredients, homemade popsicles are not only healthier but also a fun activity for the whole family to enjoy. So, beat the heat and indulge in these icy delights guilt-free!
Kitchen Tools: https://www.thinkitchen.in/collections/kitchen-tools